Porsche 911 (996) — Underbody and Wheel-Arch Dry Ice Clean
A full day under a silver 996 on a four-post lift at a Central Coast fabrication workshop: two decades of road film, oil mist and surface corrosion lifted off the engine underside, gearbox, subframes and undertray — no water, no chemicals, no media left in the chassis.
Before and after
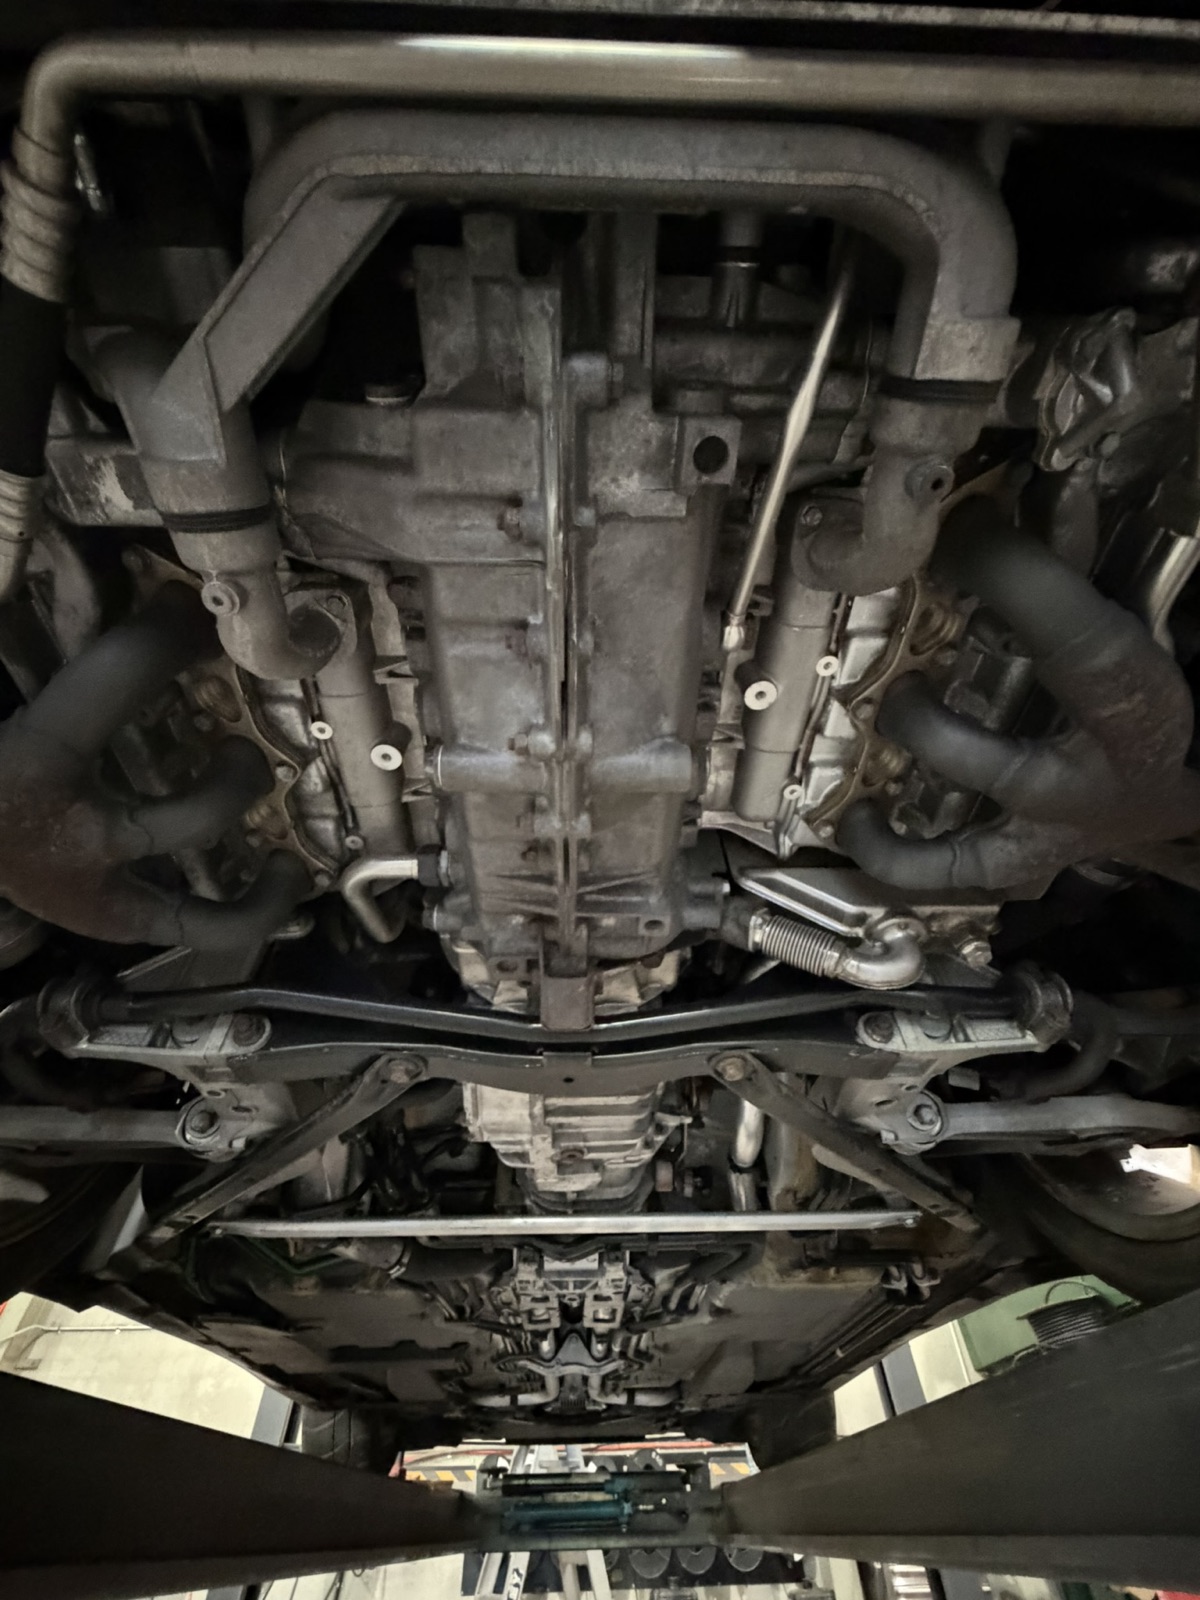
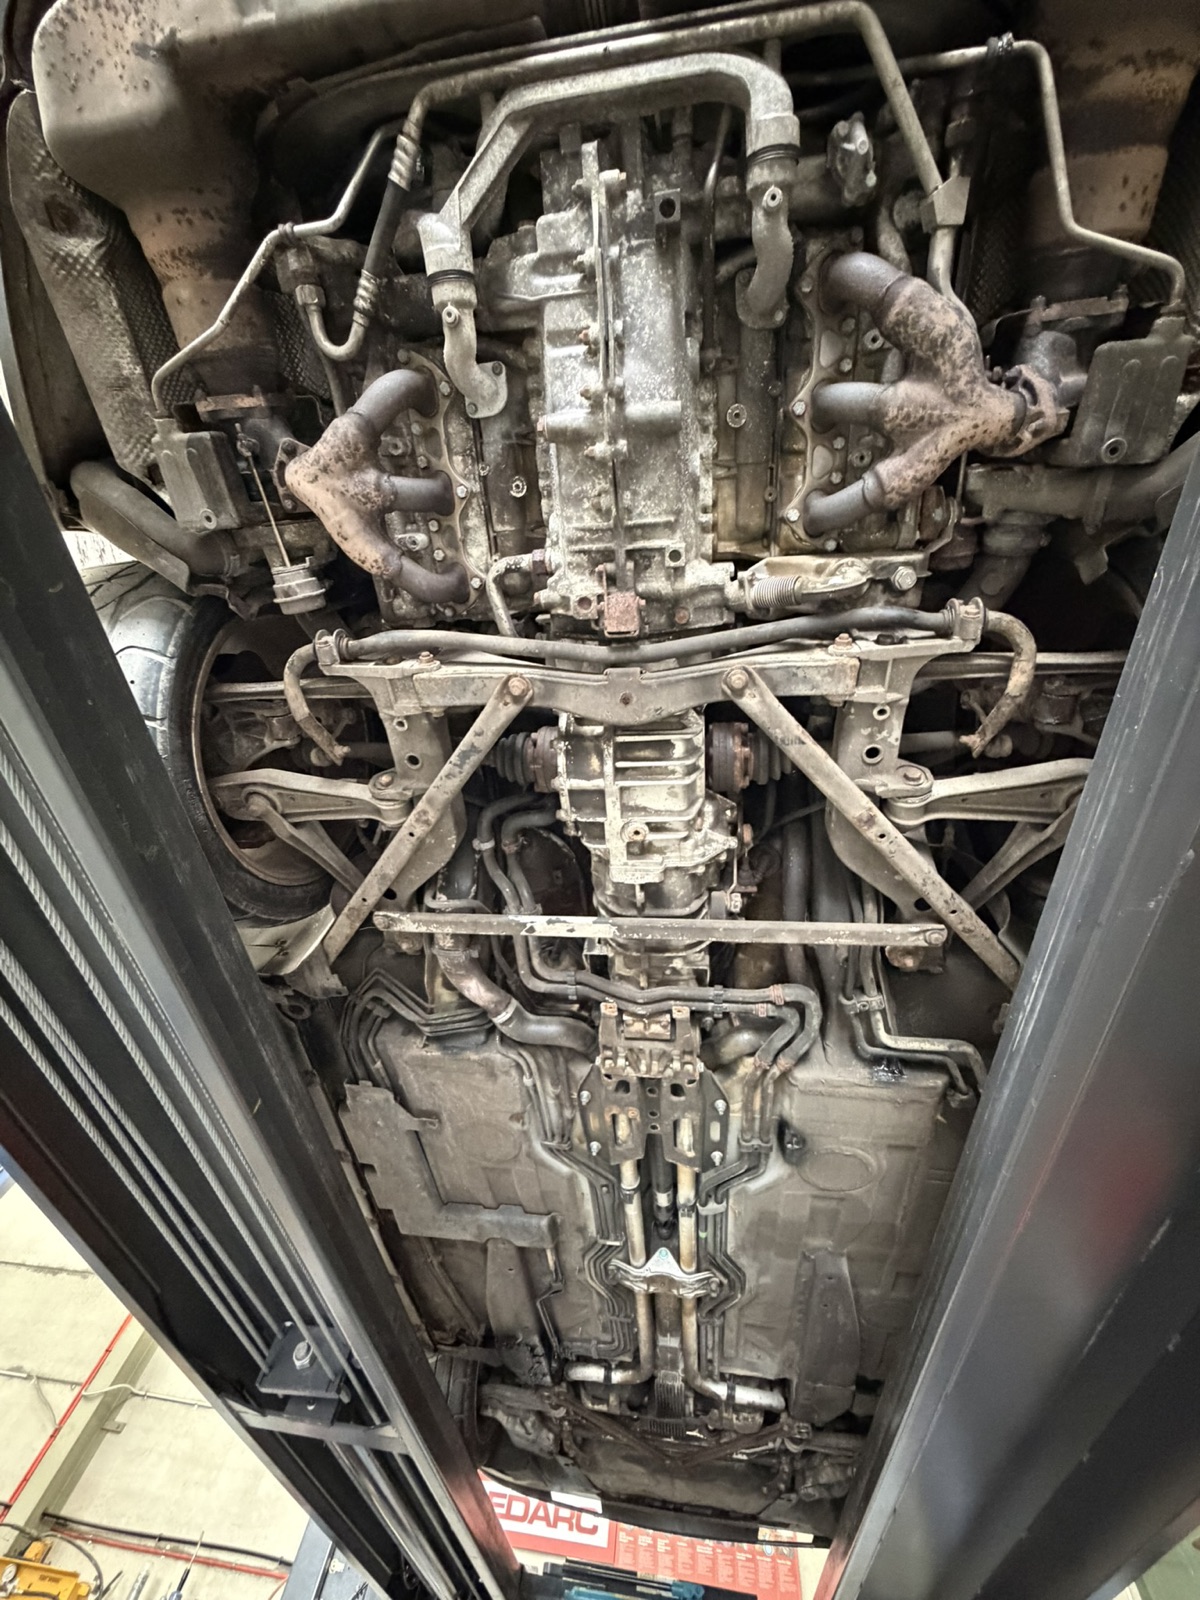
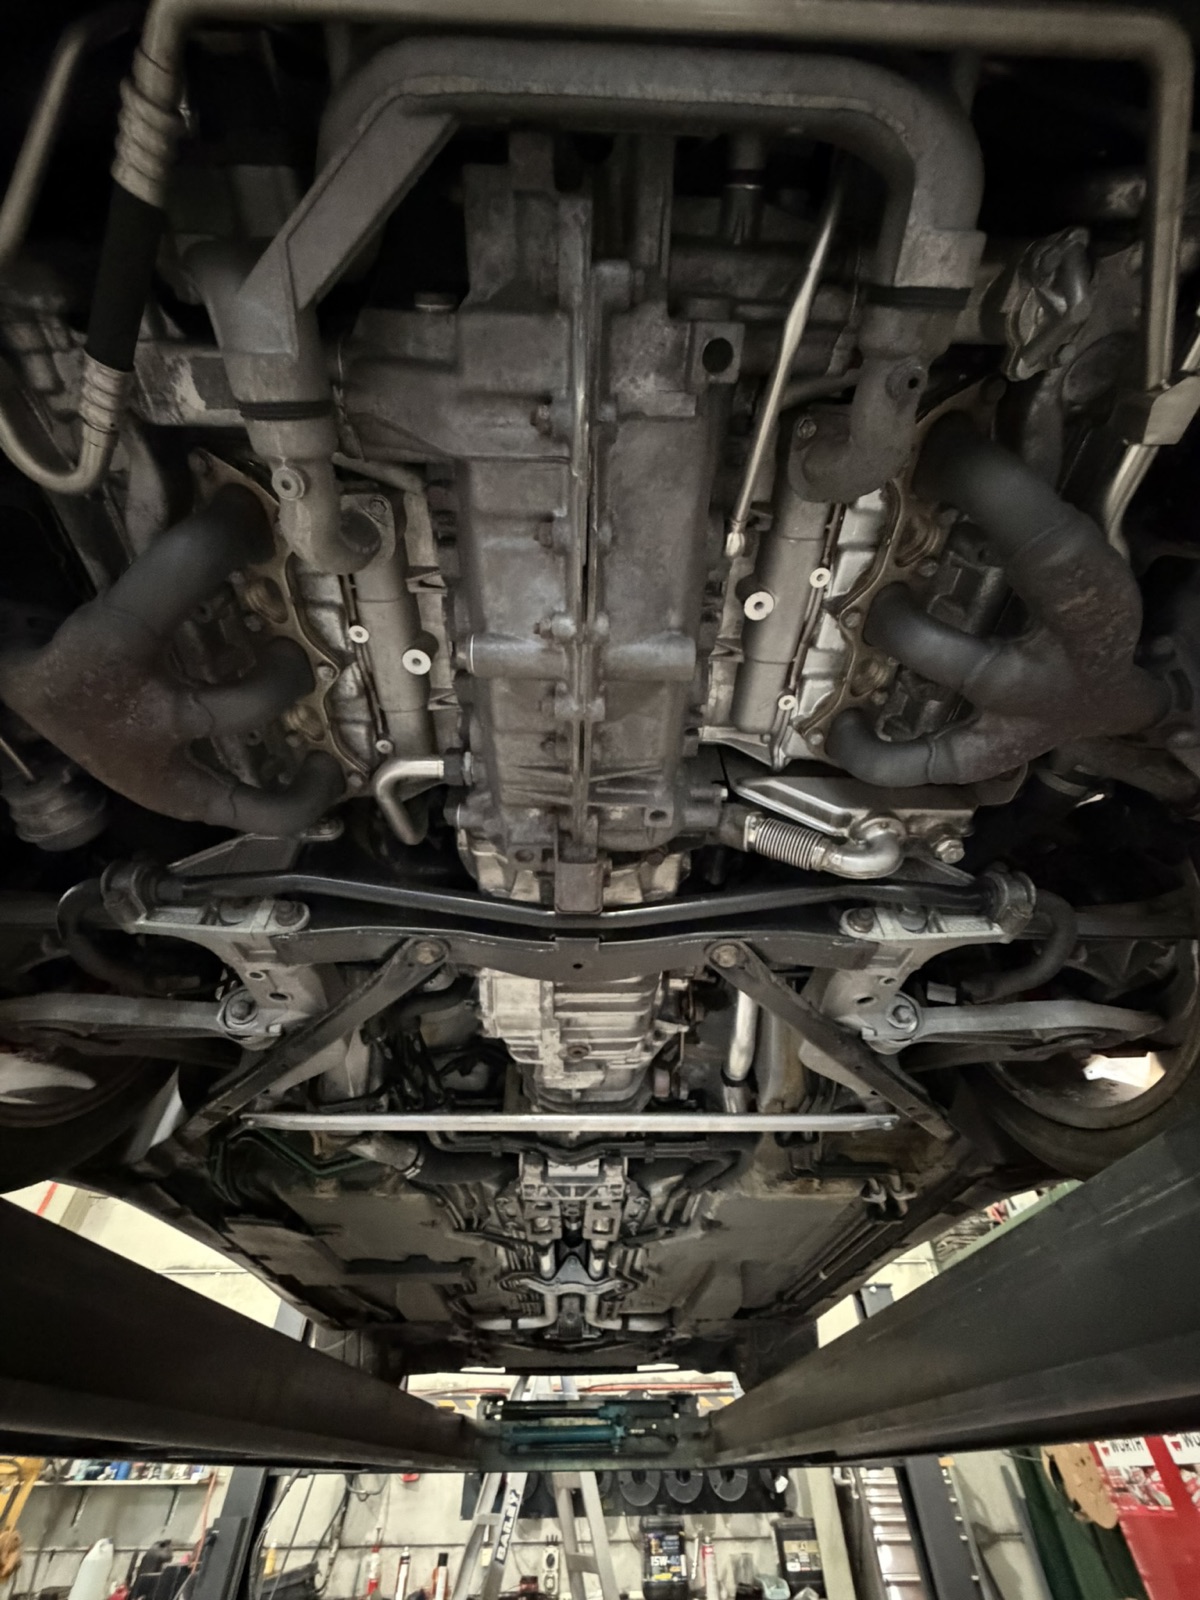
Same spot, same day. Drag the handle — Before is on the left, After on the right.
The brief
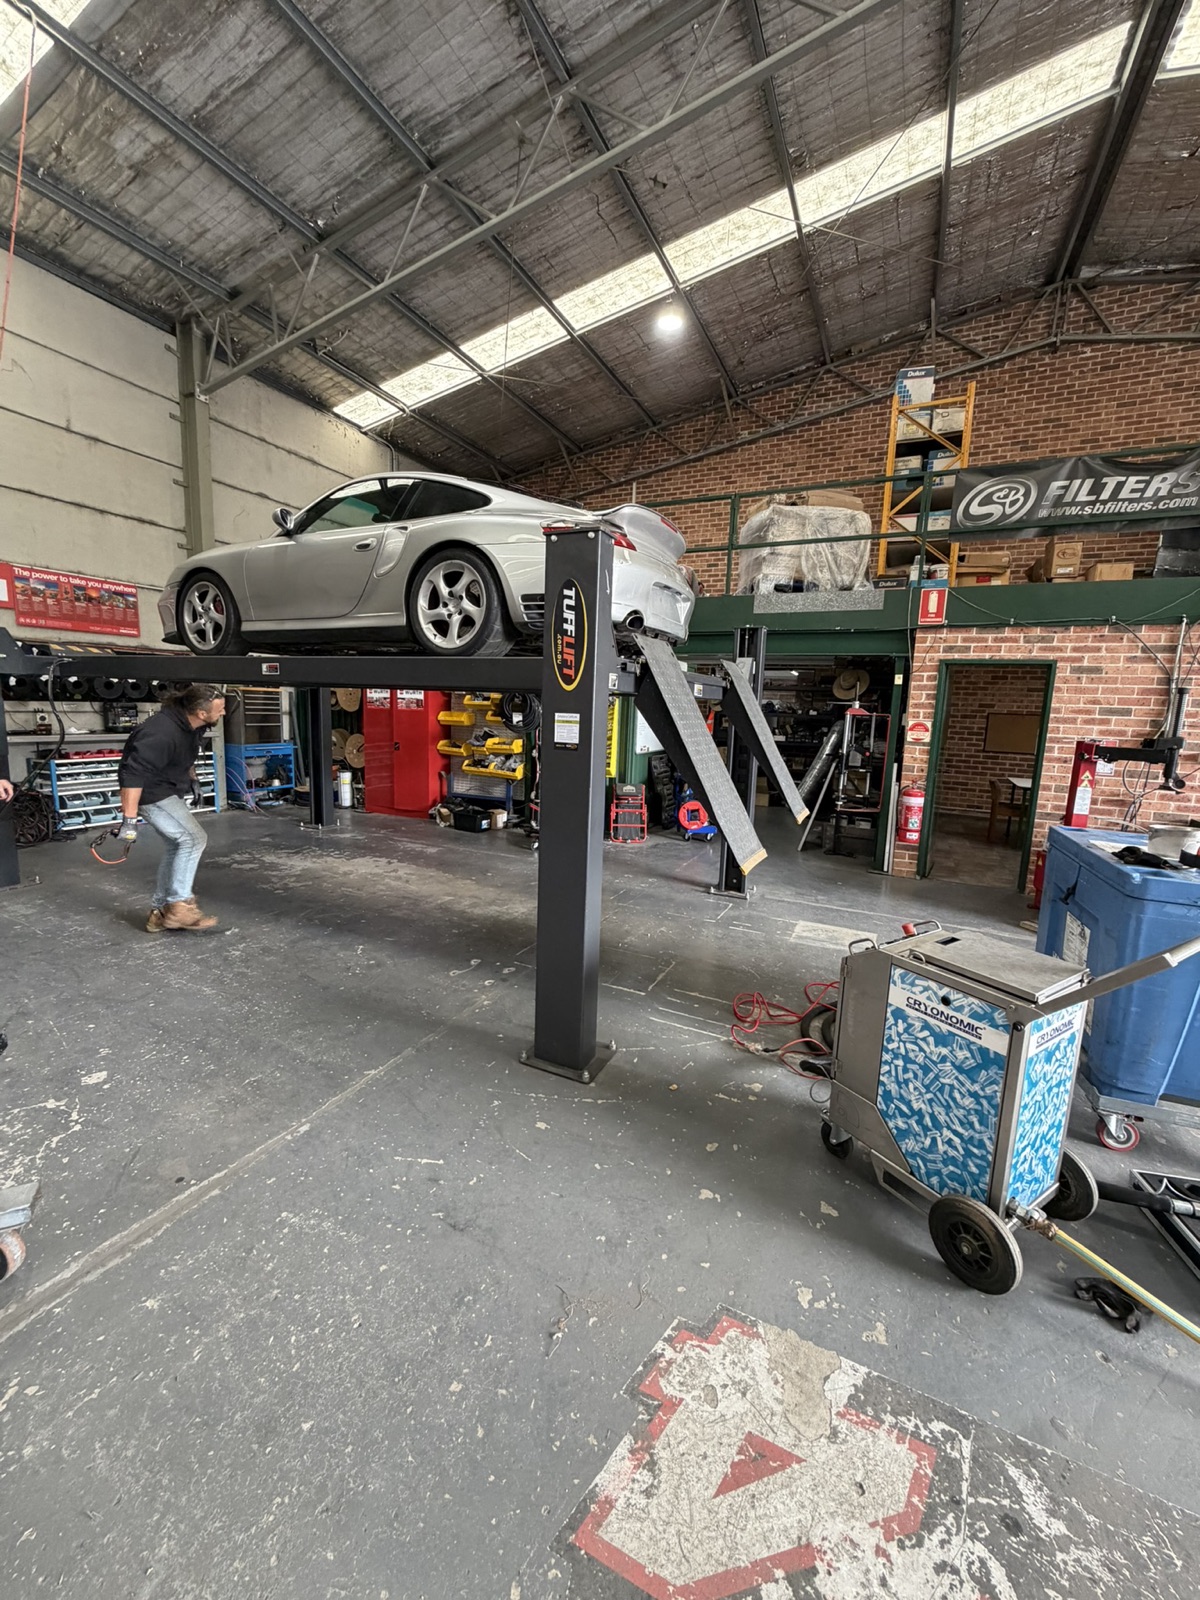
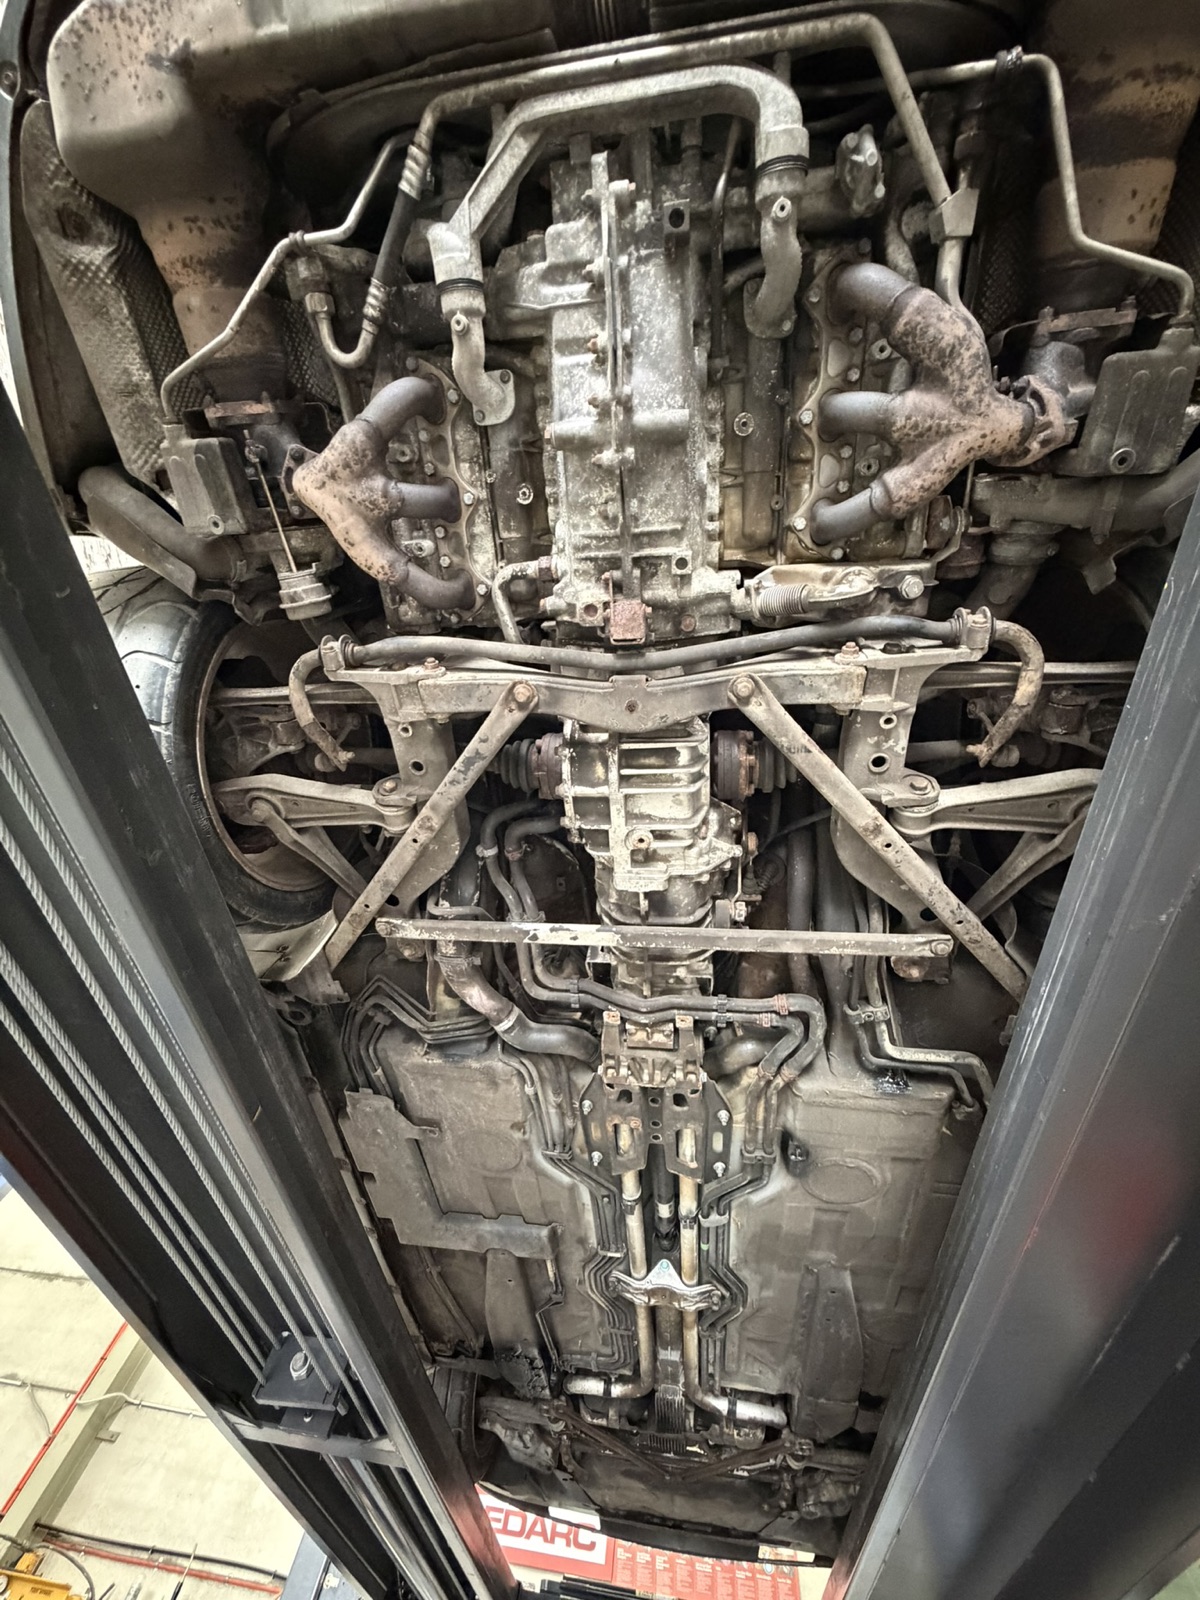
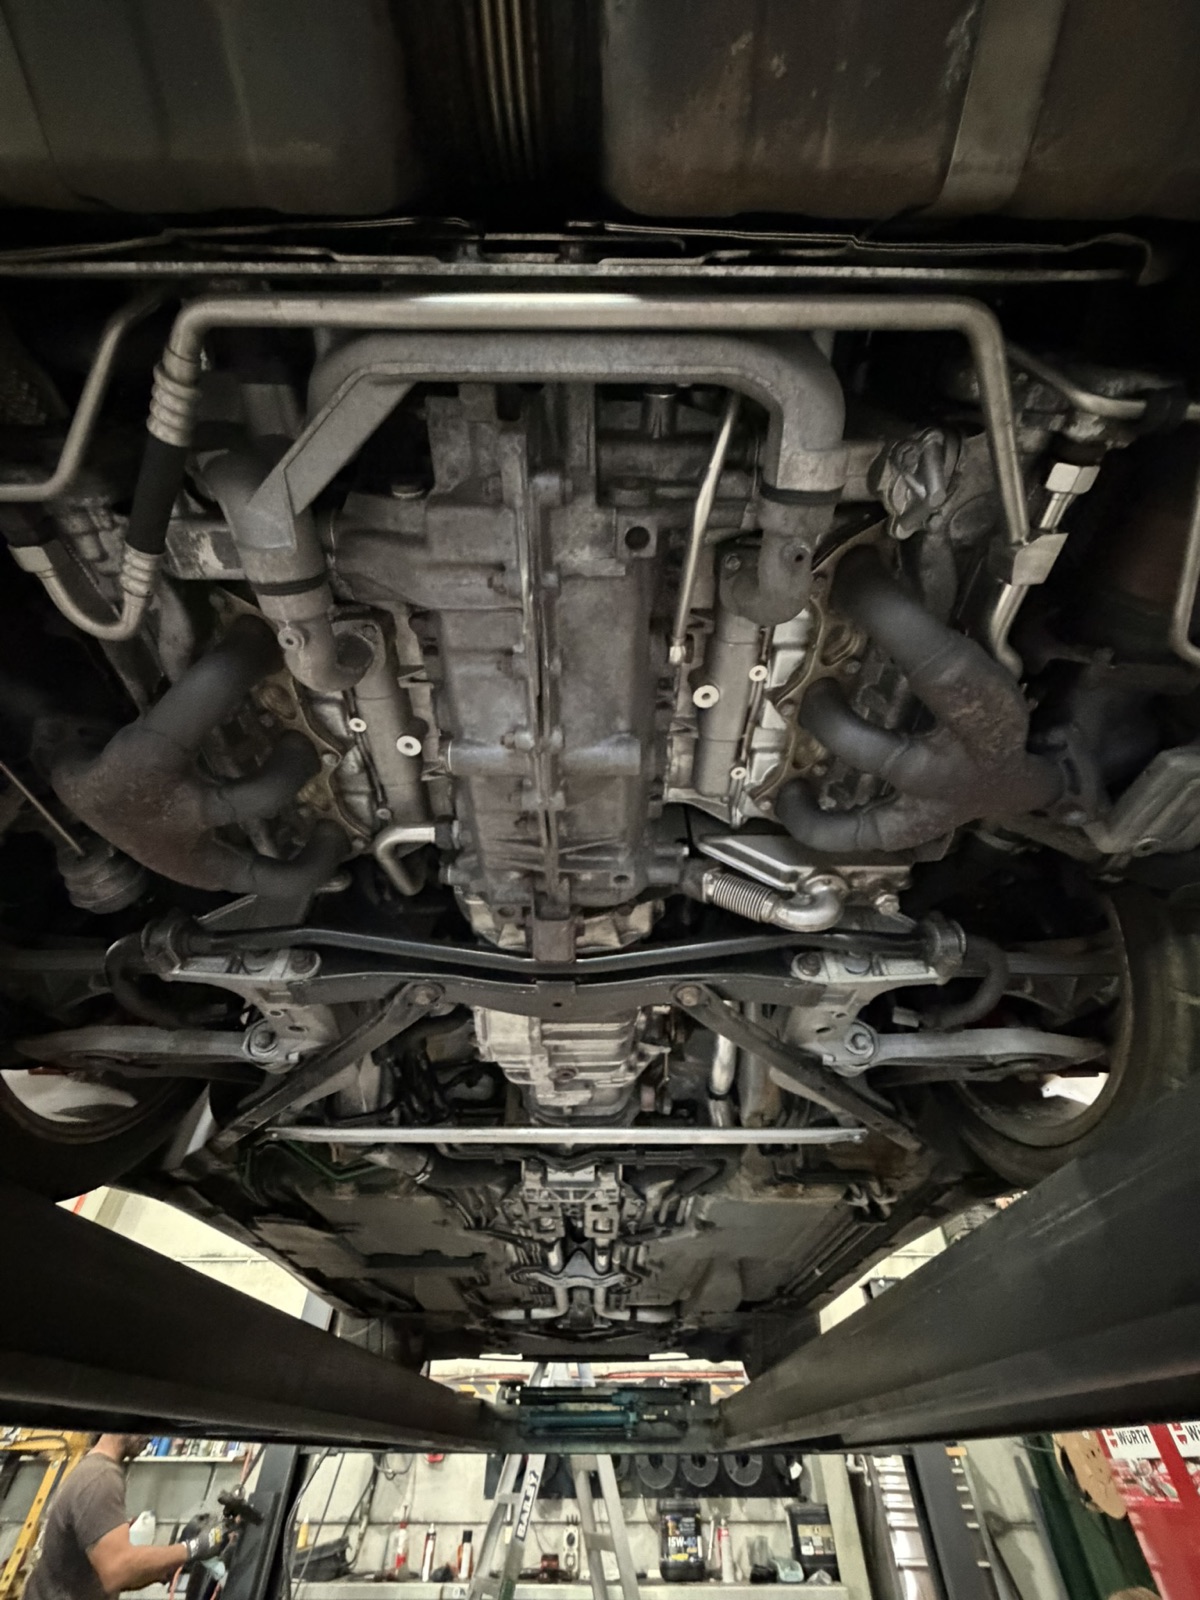
A silver Porsche 911 of the 996 generation, mid-project at PP Cutters in Fountaindale — a metal fabrication workshop on the Central Coast that does plasma cutting, welding and custom fabrication work. The owner wanted the underside of the car brought back to something he could work on and be proud of: engine underside, gearbox, subframes, suspension, undertray and wheel arches, all carrying the road film, oil mist and surface corrosion that a car of this age collects.
The scope we quoted was a dry ice clean of the undercarriage and wheel arches. No wet washing, no degreaser, no wire brushing.
Why dry ice for this car
A 996 carries its engine at the back, low, with the exhaust, manifolds, gearbox and suspension packed tightly around it. Three things made dry ice the right call:
- No water. Pressure washing an engine underside forces water into electrical connectors, bearings and the gaps between casings. Dry ice sublimates on contact — the surfaces are dry the moment the nozzle moves on.
- No media left behind. Sand, soda or glass bead would sit in every recess of the subframe and suspension for years. The only thing on the floor afterwards is what came off the car.
- Non-abrasive on alloy. Magnesium and aluminium casings, factory coatings and rubber bushes all sit within a few centimetres of each other. Dry ice is a soft medium; pressure and pellet feed were tuned down for the casings and lifted only where the corrosion on steel needed it.
The day
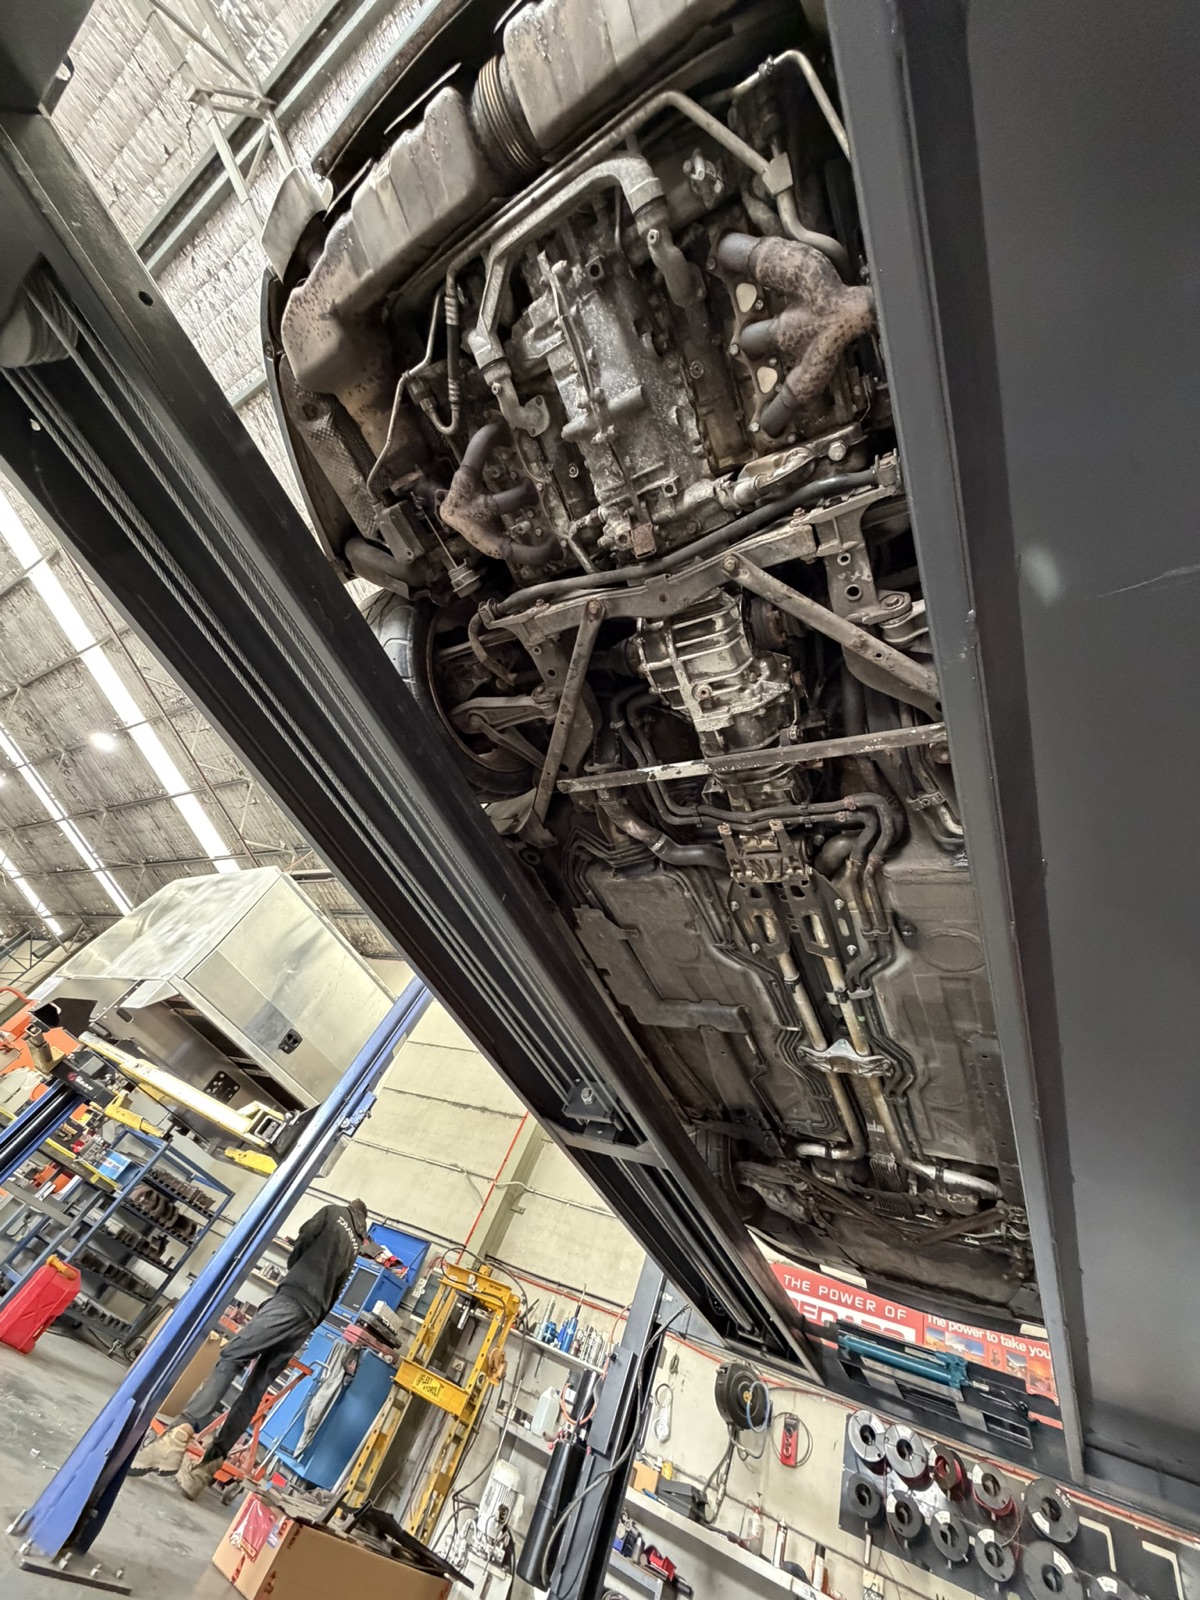
The car was already on the workshop’s four-post lift, which gave us stand-up access to the whole underside. The rig — box truck, Sullair 300HH compressor and the Cryonomic blasting unit — set up outside and ran hose in through the roller door. Pellets stayed in an insulated bin and were loaded through the day.
We started with a test patch on the gearbox casing at a low setting and showed the owner the result before continuing. That set the pressure for the alloy. Steel components — exhaust hangers, heat shields, subframe brackets — took a higher setting.
The sequence ran rear to front: engine underside and manifolds, then the gearbox and rear subframe, then forward along the undertray to the front subframe and brace, with the wheel arches worked from the sides. Hearing and eye protection throughout; the workshop kept the doors open for airflow.
What came off: bonded oil mist and road film across every casing, dust and grime from the undertray, and surface corrosion from the exhaust and heat shields. What we left alone: rubber bushes and boots (masked or worked around at low pressure), and any coating that was sound.
The result
The photo record tells it better than we can. Casting detail on the engine and gearbox is visible again, the subframes and brace are back to metal, and the undertray reads as one colour rather than a map of drips. The owner can now see what he is working on — every fastener, every line, every seal — which is the point of doing this before a project rather than after it.
Nothing was wet at the end of the day, nothing was disassembled to get access, and the car went back down on the lift the same afternoon.
If you have a project car
Bring it to a lift or arrange access underneath, send us a few photos, and we will quote the underside as a fixed price. A test patch on the day is standard practice — you see the result on your own car before we commit to the rest of it.
Photo record
Got something that needs the same treatment?
Send a few photos and we will come back with a fixed quote within 24 hours.
Or talk to us directly
- 02 5302 6367
- office@dryiceblasters.com.au
- Mon–Fri 7am–6pm · Sat 8am–2pm · Sun by appointment